

Chicken Kievs are a firm favourite in our family. We just can’t get enough of that garlic butter oozing out as we cut through the breadcrumbs and the chicken. We always have some kievs in our freezer as back up for those crazy days when making dinner from scratch isn’t on the menu.
But I wanted to see how easy it was to make some in the air fryer (we have a Philips Air Fryer). I have been busy testing out lots of air fryer recipes for my soon to be released Air Fryer Recipe Book, and I wanted to include this one.
As with all my recipes I wanted to keep it as simple as possible, without the need for endless ingredients and fiddly steps. Sure, these kiev balls take longer to prepare than many of my other airfryer recipes, but it’s still not that long, probably no longer than 10-15 minutes, plus some chilling time for the garlic butter balls. And the results are oh so worth it.

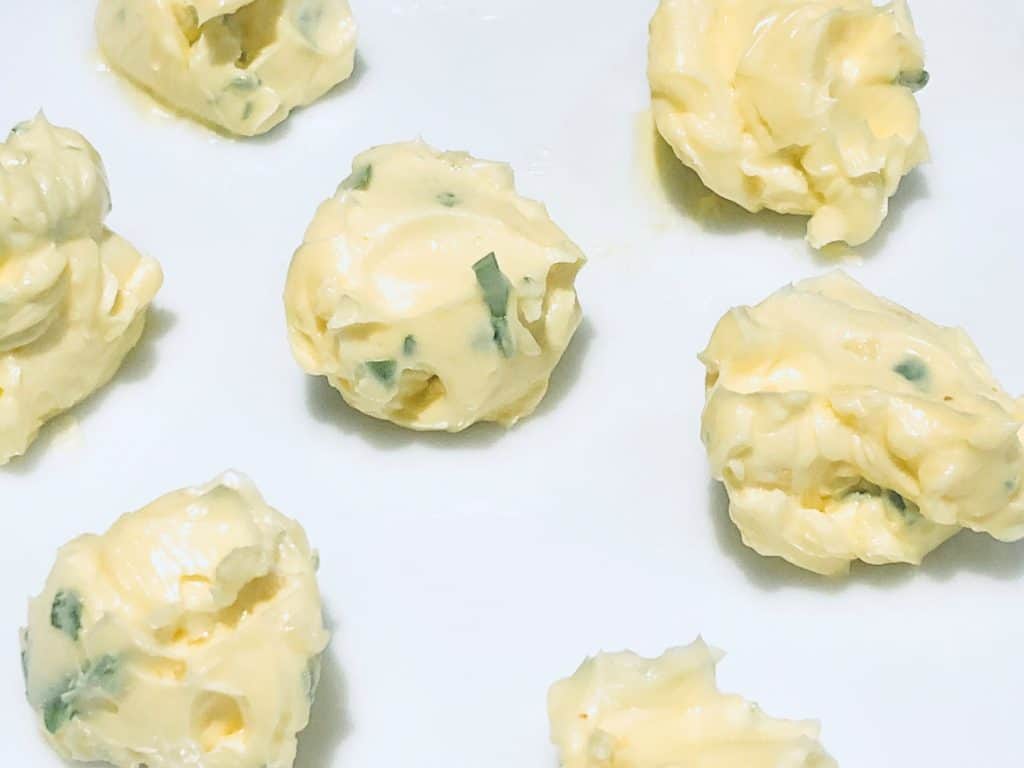
Mix together the butter, chopped parsley and crushed garlic. I used 3 cloves of garlic because I’m a bit of a garlic fiend. Feel free to use less or more depending on your own garlicky taste buds!
You can either hand mix these ingredients together, or put them in a blender. I used my Nutri Ninja to blend all the ingredients together, just make sure you don’t do it for too long or the butter will melt.
Divide the butter out into 12 (ish) equal sized balls. Pop them in the fridge, or freezer if you are short on time, to harden up.

If you are using whole chicken breasts instead of already minced/ground meat then you will need to also run this through a food processor, or high speed blender.
Once your garlic butter balls have hardened up a little, it’s time to start wrapping your ground chicken around them. Take a little bit of chicken at a time and wrap some around each butter ball as a thin layer, around 1 to 1.5cm.
Beat the egg in a bowl, ready to dip your chicken balls in. Set up another bowl with your breadcrumbs in. You can use day old bread and pop it in a food processor to turn it into small crumbs, or as I often like to do, keep some store bought breadcrumbs in the cupboard. Season your breadcrumbs depending on your tastes (salt, pepper, perhaps a little paprika if you want some extra flavour).
Side note: some people like to include some flour to this part of the process – they feel it helps the breadcrumbs hold to the meat better. I personally prefer to omit it (I don’t notice a difference). If you want to include flour just dip the balls in the flour before the egg.
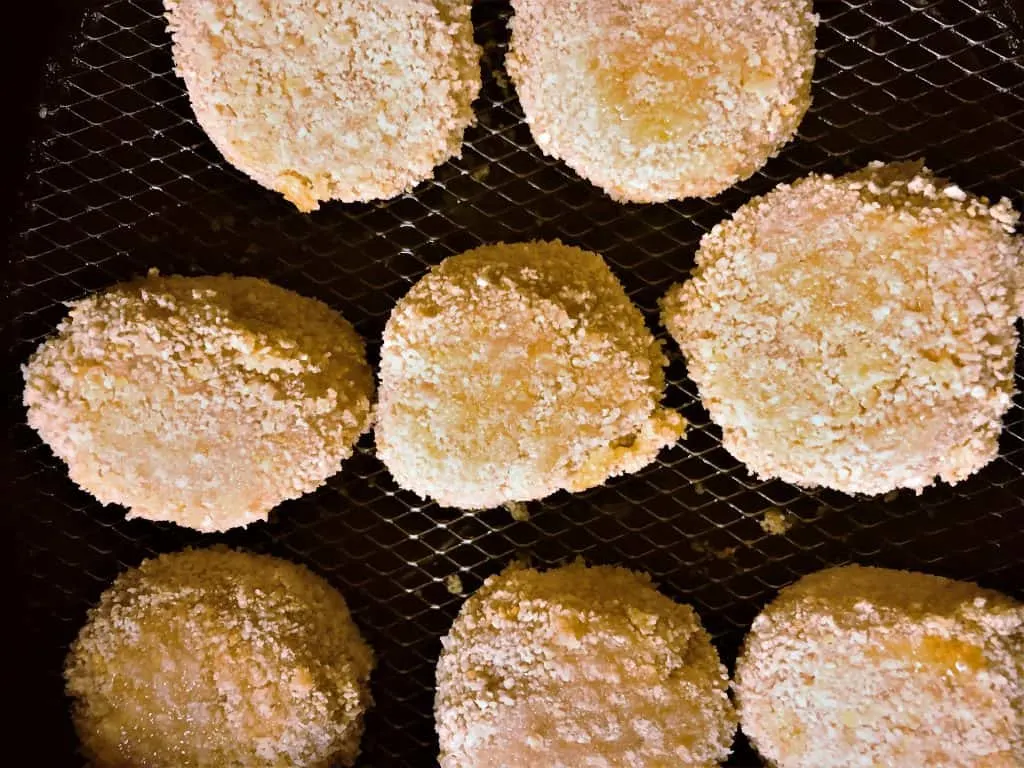
For the next step (and final part of the preparation!) I use some kitchen tongs. It makes it easier to dip the balls and ensure they are evenly coated all over. Firstly dip the ball in the egg bowl, then roll it around in the bowl of breadcrumbs. Make sure the breadcrumbs are holding on tight or the air fryer might blow them off. If need be use your hand to press them in firmer.
I sprayed them with a little oil (using an oil sprayer) and then placed them in my air fryer basket. I cooked them for 10 minutes at 200C/390F). Check half way through and turn over.

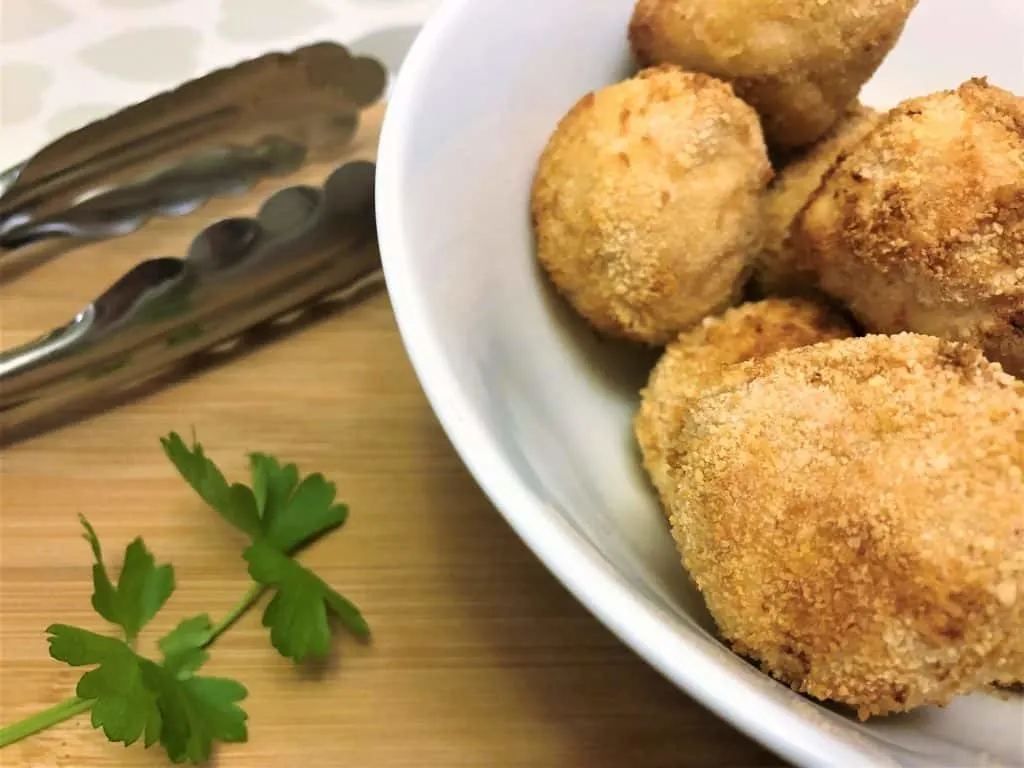
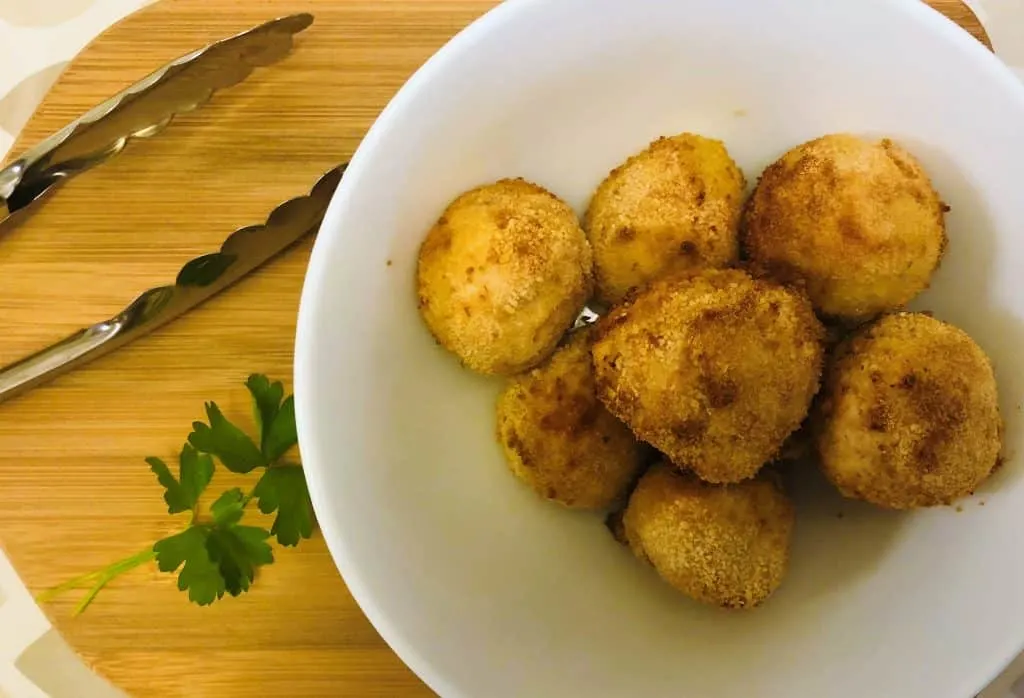
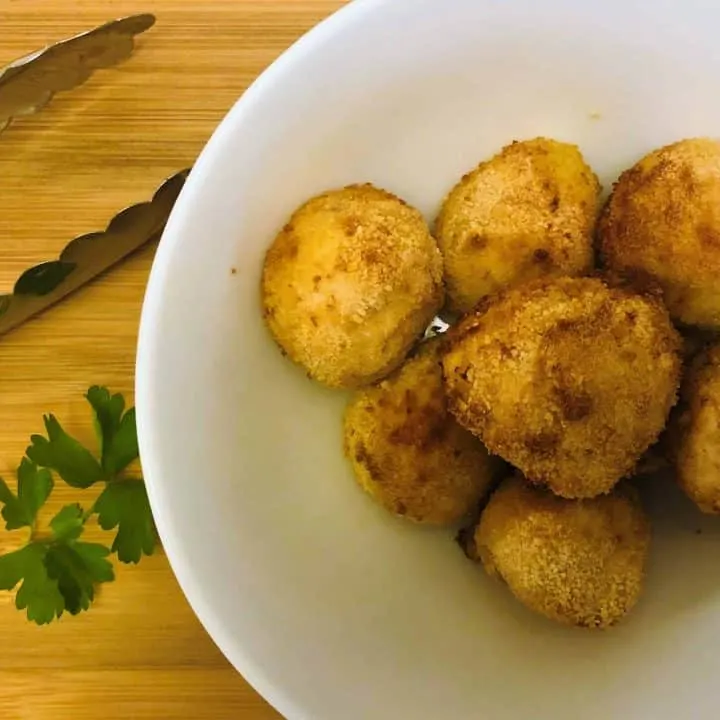
The result? Deliciously crispy on the outside, tender juicy chicken on the inside, with of course a delicious helping of garlic butter 🙂

Air Fryer Chicken Kiev Balls
Ingredients
- 300 g chicken (breast or ground), (12oz)
- 3 cloves garlic, crushed
- 100 g breadcrumbs, (3/4 cup)
- 120 g butter, (1/2 cup)
- 2 fresh parsley sprigs
- 1 egg
Instructions
- Mix together the butter, chopped parsley and crushed garlic. You can use a food processor to do this, just don't over process it or the butter will go too soft.
- Divide the butter out into 12 (ish) equal sized balls. Pop them in the fridge (or freezer if you are short on time), to harden up.
- If you are using whole chicken breasts instead of already minced/ground meat then you will need to also run this through a food processor, or high speed blender.
- Once your garlic butter balls have hardened up a little, it's time to start wrapping your ground chicken around them. Take a little bit of chicken at a time and wrap some around each butter ball as a thin layer, around 1 to 1.5cm.
- Beat the egg in a bowl, ready to dip your chicken balls in. Set up another bowl with your breadcrumbs in. You can use day old bread and pop it in a food processor to turn it into small crumbs, or as I often like to do, keep some store bought breadcrumbs in the cupboard. Season your breadcrumbs depending on your tastes (salt, pepper, perhaps a little paprika if you want some extra flavour).
- For the next step (and final part of the preparation!) I use some kitchen tongs. It makes it easier to dip the balls and ensure they are evenly coated all over. Firstly dip the ball in the egg bowl, then roll it around in the bowl of breadcrumbs. Make sure the breadcrumbs are holding on tight or the air fryer might blow them off. If need be use your hand to press them in firmer.
- I sprayed them with a little oil (using an oil sprayer) and then placed them in my air fryer basket. I cooked them for 10 minutes at 200C/390F). Check half way through and turn over.
Notes
Side note: some people like to include some flour to this part of the process - they feel it helps the breadcrumbs hold to the meat better. I personally prefer to omit it (I don't notice a difference). If you want to include flour just dip the balls in the flour before the egg.
Bernie
Monday 7th of August 2023
Hoping to try the whole chicken soon
Beverley Williams
Friday 21st of February 2020
Sounds great can't wait to try